I am in the middle of making a new shoal draft rudder.
Here are some pics.
The rudder is a Naca0017 design - 32 inches long, 23 inches deep and 5.44 inches wide at 30% chord.
I have designed it such that the rudder pivot point is at 15.6% chord thanks to Guillaume's suggestions.
She will then be filled with 2" blue polystyrene and then cut to shape using a hot wire.
Once she is shaped I will glass it altogether.
If anyone has any suggestions...don't hesitate.
Thanks,
Adam
Last edited by amayotte on Wed Jul 07, 2010 10:19 am, edited 1 time in total.
I'm planning on getting ready to cut and glass blue styrene for my C-22 tomorrow. Did a test layup on the inexpensive blue insulation sold at Home Depot. It fits the bill! I'm planning two layers with carbon fiber between and then a schedule of 10oz woven mat, 6 oz uni running lengthwise, another 10 oz woven and a final 6 oz top layer. I debated on a layer of carbon fiber between the uni and the 10 oz woven because it would look cool, but it's over kill and I plan on painting the finished rudder anyway.
It's hard to say how much it will weigh. I can't see it being much more than
what there is now.
It will be more just because I don't have a form to build around and am stuck using MDF...but i'm not too worried about it.
The trade off will be well worth it. I hate it when in shallow waters and I can't
steer because my rudder hits the motor.
It's called MDF. Medium Density Fibre. It's a combination of glue and wood fibre.
It does swell really bad once wet but since this will be completely glassed I'm not too worried about it.
It's very cheap and extremely easy to work with and glue together.
Here is the rudder after I went over it with a hot wire.
I have a huge question for those of you out there. The hot wire worked really well but there are a couple spots that need to be filled before I glass it. What would be a good filler to use? It would be nice if the filler is sandable so I can shape it to the rest of the rudder.
It is already mixed the stuff I have is made by hobbico but at the hobby shop it will probably be by another company. Here is what I have from towers hobby.
Sorry it took so long for me to reply... lost my password. Beau was great getting me connected again.
To the micro baloon. They are the correct thing to use. The trick, though is that the foam is much softer than the micro so final sanding can gouge the foam and leave the micro locations too high. The best way is to make a sanding board at least two feet longer than the distance between your two cutting templates. A piece of aluminum angle from Home Depot works fine. Use spray adhesive to attach sand paper to the center of one face of the angle. Leave at least one foot on each end of the angle without sandpaper. You can now sand with an end of the angle on each of the templates. This will leave the templates accurate and bring your foam down to a nice smooth surface between them.
Another tip for glassing: Use 100% polyester on the very top layer and wet it in just like you would your glass mat. When it has completely set you can pull the poly off and have a very smooth finish but with microfractures that will hold other glass layers or paint very well.
Micro Balloons and Tower Hobby links. I'm getting the feeling a few of us have cut a foam wing or two. Or maybe made a wing fillet...
The sanding bar is the way to go, and another good tip is to lay some masking tape past the micro balloons area. That way if you do gouge anything it will be the tape, plus it gives you an indicator of when you reached flat between the filler and the foam around it.
Paul wrote:
Another tip for glassing: Use 100% polyester on the very top layer and wet it in just like you would your glass mat. When it has completely set you can pull the poly off and have a very smooth finish but with microfractures that will hold other glass layers or paint very well.
Paul,
I'm not too sure what you mean by this.
Of coarse I have to use epoxy to glass it since polyester will melt the foam. But your saying after all is said and done do a final layer of polyester resin? I don't understand why that would make a difference.
From everything I have read you can epoxy over epoxy as long as you sand and wipe with a small amount of Acetone.
I'm sorry but I don't thing I know enough about glassing to get what your telling me...can you clarify?
There are two types of resin, poly and vinylester. The later will not melt your foam. I did not mean to imply covering the entire thing, but just to use this in sanding down the high spots you make with the micro/whatever mixture. This is to avoid filling a low spot with micro and then creating other low spots around this hard spot when sanding. If my meanderings are still unclear give me a call: 303-903-1270. I'll be out changing the brakes on my truck.
I just started to fiberglass the rudder today. I have put 5 layers on her and she seems fairly good but still a little squishy.
I was wondering if anyone could give me an idea as to how many layers a person should put on or just keep going until it's solid?
I was also wondering if someone new of a good marine paint I could put on the rudder or something that might mix well with epoxy resin.
At 5 layers (not sure what weight glass you are using) you should be pretty solid. I'm assuming you are using glass mat and it's all the same direction. Make sure you put a couple layers on the bias (45 degree angle). That makes a huge difference. You can also make a temp/portable oven and bake it to around 400 degrees. That changes the structure of the resin. Just set it on a piece of aluminum foil, shiny side up. Cover with clear plastic 3 mil or thicker and let the sun do its work.
Awesome tips Paul. I am going to try them.
However the weather just dropped to a beautiful 4 deg C with the occasional snowfall mixed with freezing rain so I am probably going to have to wait a week or so for some nice sun.
I just love northern Canada sometimes.
The epoxy has no strength of its own. You would just create a brittle surface prone to cracking if hit by anything. It's the combination of glass and resin that creates the strength... like agregate in concrete. If you want to create hard points to fasten things to or protect the surface you can add to the resin: microballoons (discussed before) to build up an easly sandable surface or cotton flocking which makes the cured resin very hard. We used it for making wingtips and other parts prone to impact.
Here is the finished glassed foil. I think I am going to leave her in this state and get the boat in the water and next year paint her.
Oh ya, I thought I might as well post this while I'm logged in.
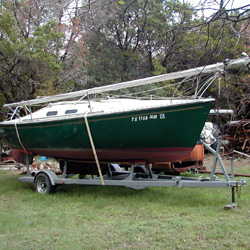
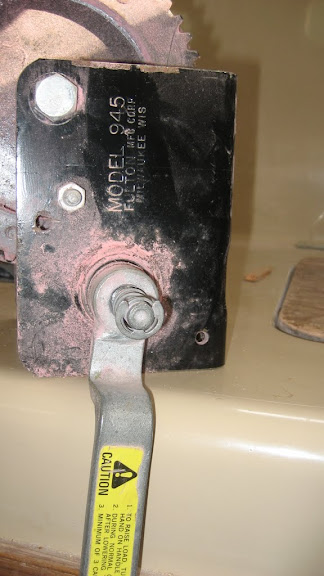
I pulled the old keel winch which turned out to be a Fulton 945.
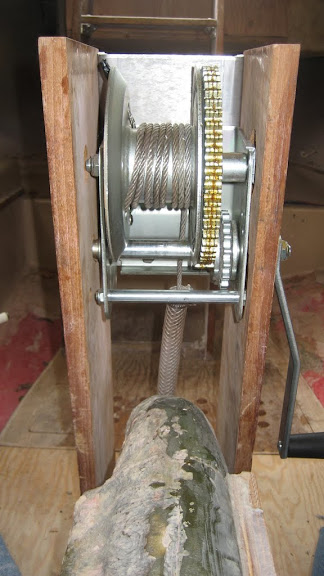
I replaced it with a Fulton 1550.
I have to replace the cable now because it was like handling a rose stem with all the wires sticking out. Lots of band-aids when I was done.
Nice work on your rudder... I for one would lack the nerve for such an extended project, but to my question at hand. Changing from the Fulton 945 to the Fulton 1550... did you find you needed to make any modifications to get it to fit properly? As you can see I'm due for a change.
Terrence
Wilmington N.C.
Chrysler 26 1980
Pandora (for now)
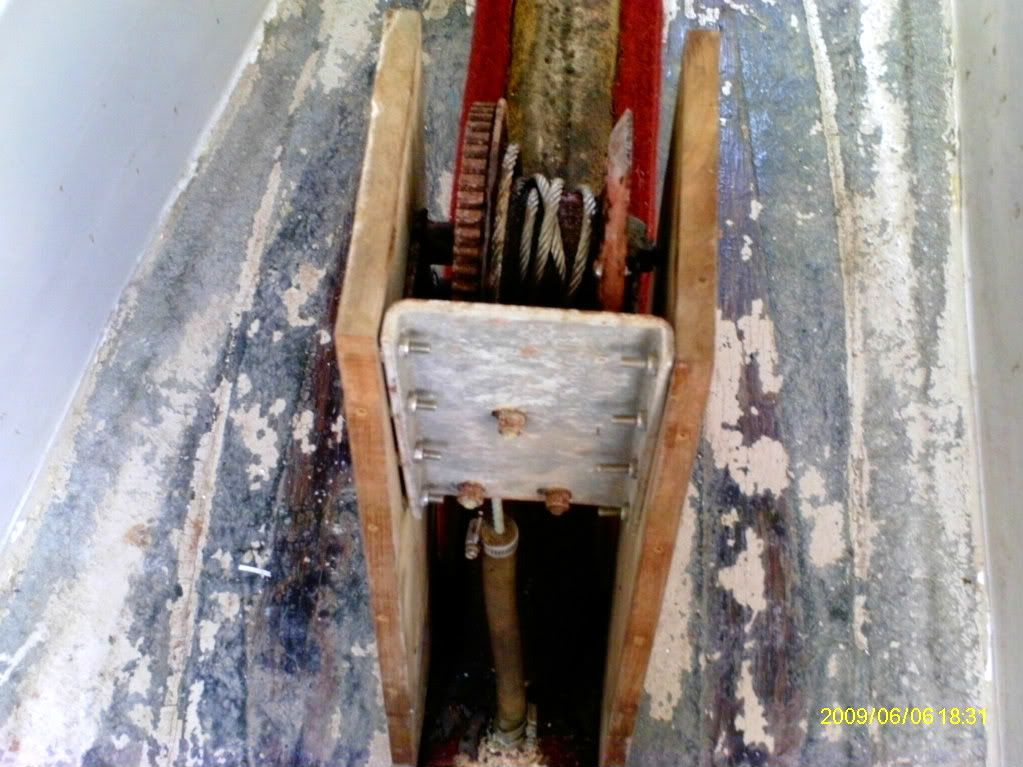
no, the only change was to the wood. I needed to make one hole larger and one hole on the other board to accomadate a new bolt in the winch. Very easy. You won't have any issues.
I think the two winches are the same size.
Here are some more pictures of how the new rudder post, tube, and bushing all fit together.
First the post attaches to the rudder
Then the rudder post and bushing are placed into the tube. This tube is a FRP tube that I glassed into place last summer. (still haven't finished the final glass touch ups)
Once the post is in place the upper bushing, lock collar and tiller attachment are put into place.
(I still have to cut off the excess rudder tube.)
This setup is extremely smooth and tight. I am very happy with and glad that I spent the time to do this...very excited.