
http://www.byershome.net/_Boat/Chrysler ... ridlel.htm
I needed to do some setup work on the boom and needed it in place to do it so I finally got some pictures of the setup I use to raise and lower my mast.
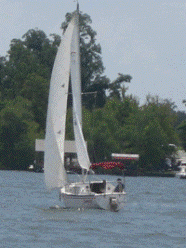
Up with the mast...............
-
EmergencyExit
- Site Admin

- Posts: 2956
- Joined: Wed Dec 10, 2003 5:02 pm
- Location: Mississippi Gulf Coast

I think the part that helps me the most is doing away with using the boom as the jin pole. I just happen to have some oval spar material from an old boat i scrapped to make one out of. the pin for fixing it to the mast is bolted on the jin pole and I have put some attachment points on the other end to make hooking the lines up quick and easy. I'll have to add some detailed pictures of it later.
The wheel.................
http://www.byershome.net/_Boat/Rudder/rudder.htm
I did not really take to many pictures but this is what I ended up with. The boat had the wheel (yes it is an Edson) but the rudder shaft leaked because the location of the wheel on the shaft would not allow the shaft hole to get above the water line. So I moved it above the deck and extended the rudder shaft tube up to the bottom of the deck. It's a tight fit but it appears to be handling the loads put on it.
I did not really take to many pictures but this is what I ended up with. The boat had the wheel (yes it is an Edson) but the rudder shaft leaked because the location of the wheel on the shaft would not allow the shaft hole to get above the water line. So I moved it above the deck and extended the rudder shaft tube up to the bottom of the deck. It's a tight fit but it appears to be handling the loads put on it.
THanks..incredible creative problem solving and fabrication ...and a whole lotta work! I am no so jealous anymore of you guys with the wheel steering!
Where did you get your rudder blade from looks great and new...mine might be on its last legs...also source for the solid stainless rudder shaft as well...mine is OEM alum I think
Where did you get your rudder blade from looks great and new...mine might be on its last legs...also source for the solid stainless rudder shaft as well...mine is OEM alum I think
It's the original..........cleaned up, painted and yes I had to do some modifying in the area as well because my rudder shaft is solid SS. I f you look closely you'll see an extra bolt underneath the pivot. It is tightened just enough so that in the full down position it won't move back up. The rudder itself is slotted in this area to allow the bolt to pass through and free movement from the full up to the full down position. The closer to full down it gets the tighter the fit. The rudder slides up from below on to the shaft. It was originally held up by just two bolts with nothing more than friction against the shaft. The shaft was not even flat spotted where the bolts made contact. It is a wonder it never fell off. I have a bolt through the shaft now (oddly the shaft had a hole already drilled through it right where I needed it)and the shaft has been notched to a flat spot for the bolts to tighten against.