C-13 Barracuda "restoration" discussion

Here you can discuss Chrysler Sailing across all makes of Chrysler sailboats.
Post Reply
User avatar
kobrie38
Posts: 12
Joined: Sun Jul 24, 2011 12:38 pm
Location: Buffalo, NY

C-13 Barracuda "restoration" discussion

Post by kobrie38 »

Hello all,
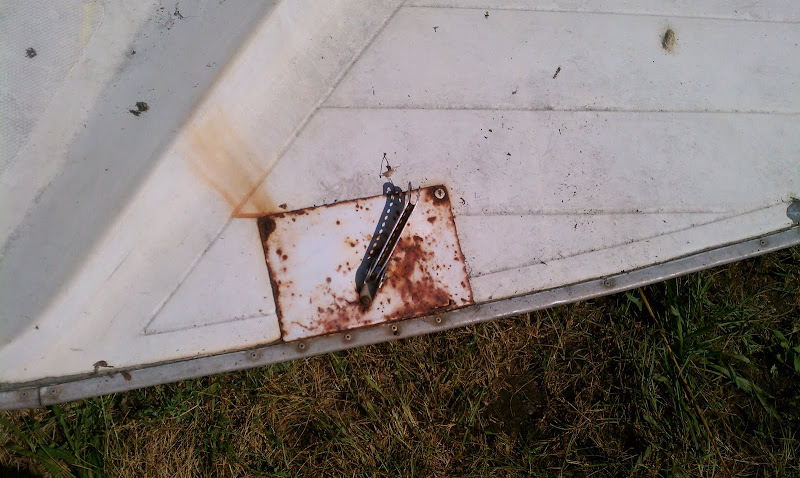
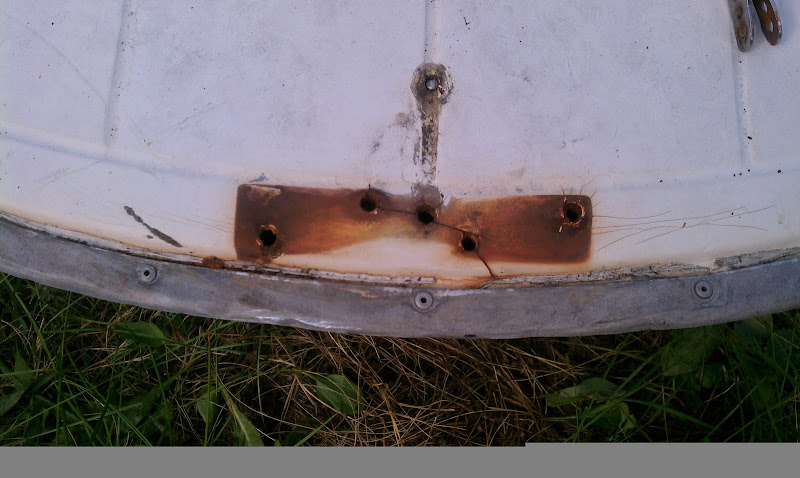
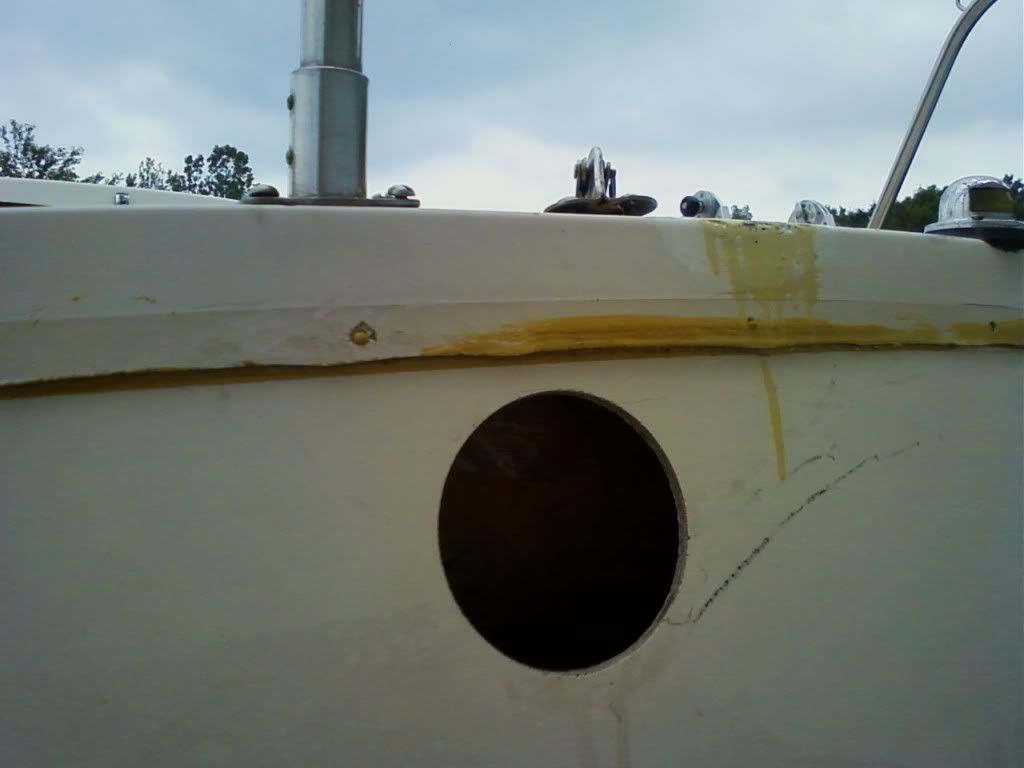
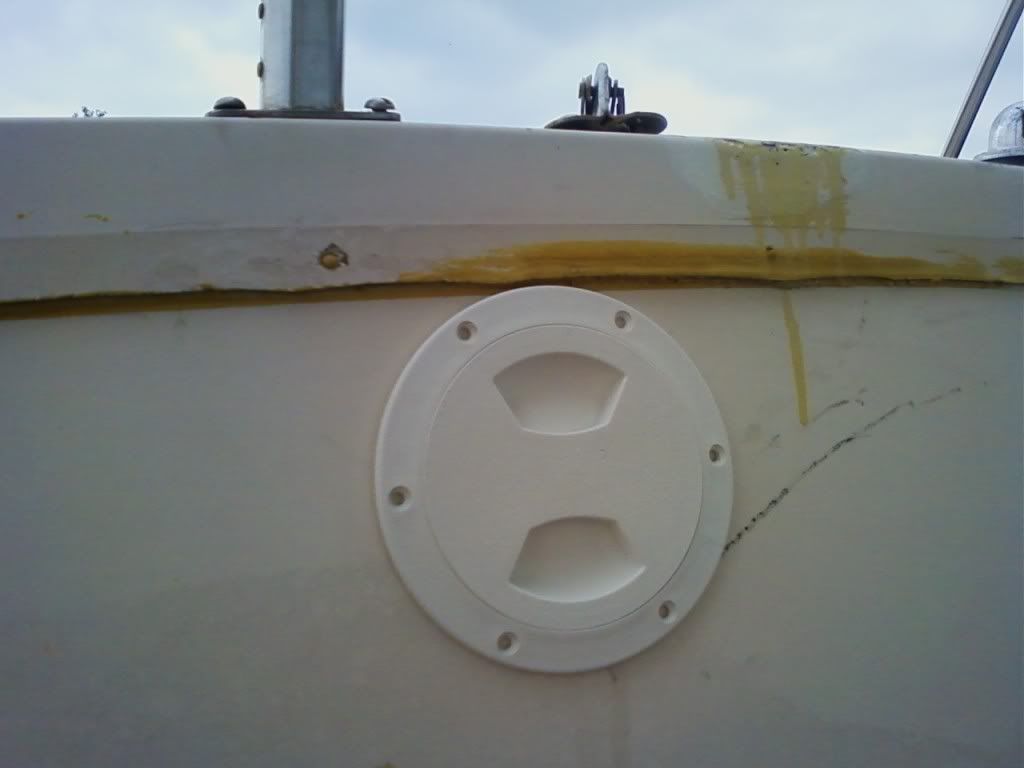
I recently bought a 13 foot Barracuda in less than optimal condition hoping to restore it to it's full potential. However, the plates that hold down the mast cables are in poor condition, and was going to replace them. After searching high and low and not finding anywhere to replace them, I decided to pull them off and sand blast them. This also seems to be useless, as they are attached into the rub rail that goes around the boat. Does anyone know how to easily remove these, and maybe even where to buy new ones?

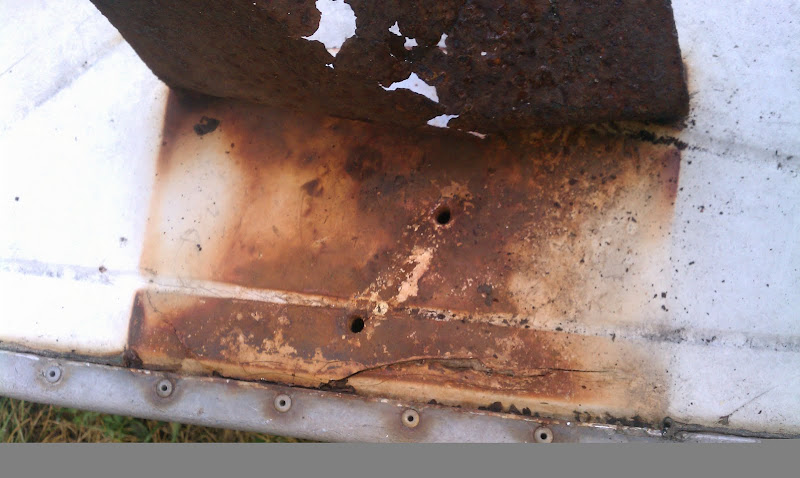
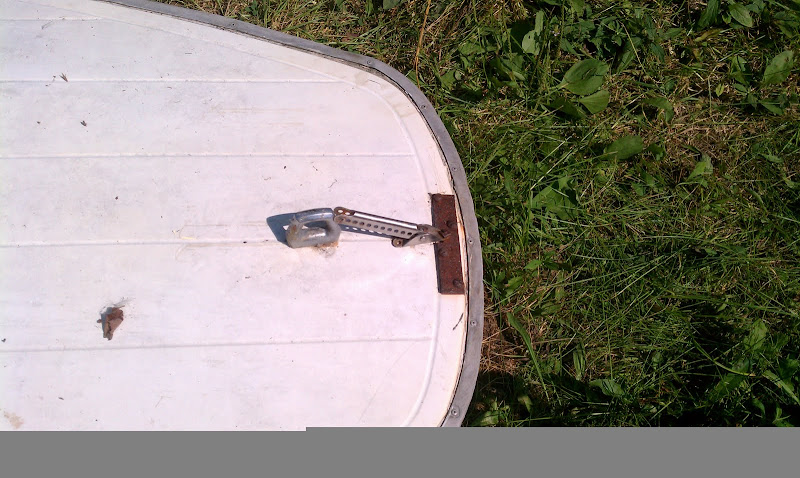
Also, if you see in the second picture, the bow eye has some rust bubble in it, and I was going to sandblast and polish it, but I also cannot figure out how to remove it. There is no bolt in it, and just spins aimlessly instead of screwing out of a hole.
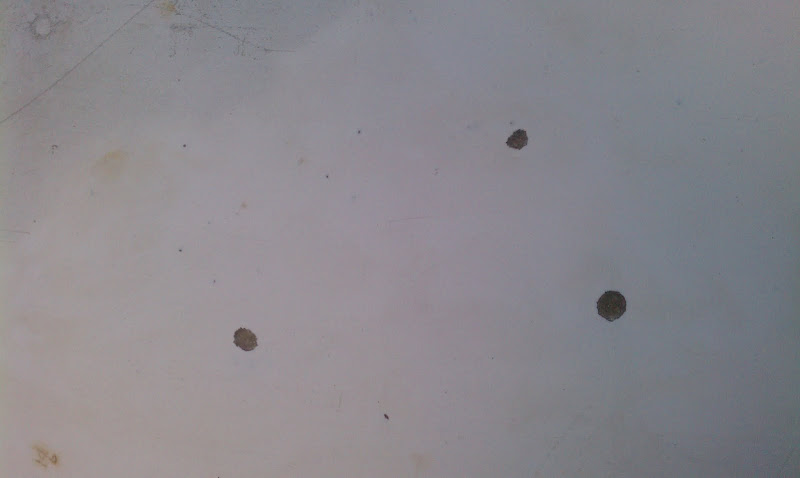
The worst of them:
Image

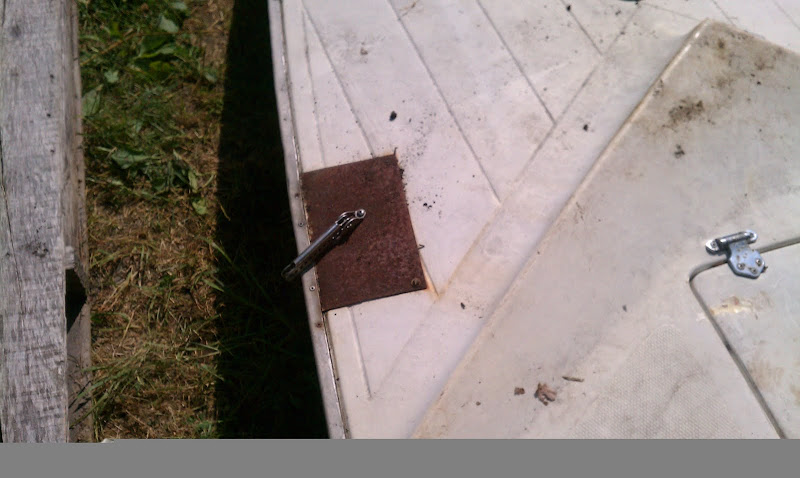
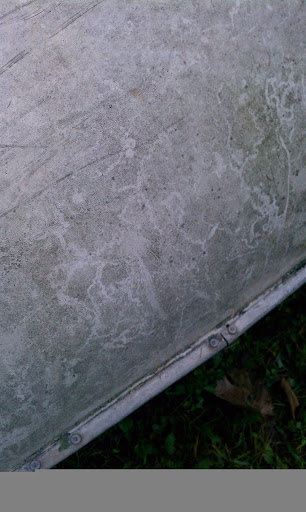
Bow eye and bow plate:
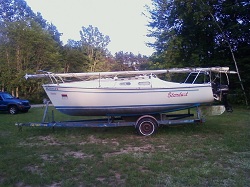
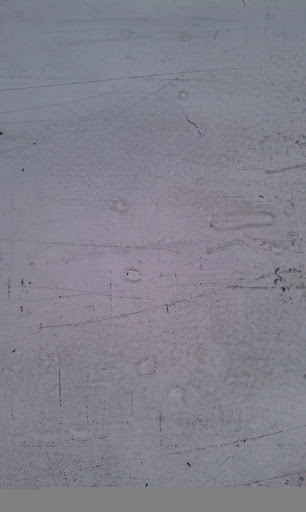
Image

Starboard:
Image
Last edited by kobrie38 on Mon Jul 25, 2011 9:49 pm, edited 1 time in total.
Ex Scientia Tridens
mariner
Posts: 412
Joined: Thu Aug 21, 2008 3:33 am
Location: Cleveland, Ohio

Post by mariner »

Hi-and welcome aboard! Be shure to check out the cover page and download the parts list and manual.

http://chryslersailors.com/Documentatio ... racuda.pdf

Looking at your photos, it looks like these plates may have been added ? If so you can easily fabricate a replacement if desired. Check out speedy metals on line they will cut to length/shape anything you need. Typically these connections would be through bolted. You may need to get to the underside to check it out and see whats going on. Best of luck p.m. Me if you would like to discuss or need additional info. :D

No worries !

You may want to checkout the plyglow web site and get some polyox cleaner to scrub off the rust so you have a clean surface to work with...
Last edited by mariner on Sun Jul 24, 2011 2:21 pm, edited 2 times in total.
1976 - C22
"AnneMarie"
User avatar
kobrie38
Posts: 12
Joined: Sun Jul 24, 2011 12:38 pm
Location: Buffalo, NY

Post by kobrie38 »

So, an hour later and I got them off, but it seems that it's been one step forward and two steps back.

The port side plate I could remove one screw, bend the metal around the other, and lift up, but it was still held in by the rivets that hold in the rub rail. On the starboard side, the screws are too rusted to remove, but the rust was so thin, it could be broken off around the rivets. Before they were even moved though, I unscrewed all three cable holders, and to my dismay, as I unscrewed the last one and heard a bang I realized that none of the screw seats were attached to the hull, and the port and starboard ones both fell into the hull. As I removed the plates, I also found that the deck was severely damaged under them. What I want to know is: 1) how can I remove these rivets and rub rail, 2) how can I fix these cracks in the deck, 3) how to remove this bow eye, and 4) how can I get these screw seats into position while still making the smallest cuts possible?

Bow cracks:
Image

Starboard cracks and rust:
Image

Port (the plate is still attached at the rivets, the angle just makes it hard to see):
Image

EDIT:
Thanks for the welcome! Looking at the diagrams, looks like your right, these plates were probably added to cover up the cracks. And how can I get to the bottom to get to the bolts? And for the rust, I'm just going to pressure wash it.
Last edited by kobrie38 on Sun Jul 24, 2011 2:27 pm, edited 1 time in total.
Ex Scientia Tridens
mariner
Posts: 412
Joined: Thu Aug 21, 2008 3:33 am
Location: Cleveland, Ohio

Post by mariner »

Looks like the plate was placed because the original fitting failed. You van remove the rub rail rivets by drilling them out. Start with a small diameter and work up till you find the correct one. There is probably more than one way to fix this it just depends on how much work you want to put into the restoration. You will need to get to the underside of the deck so you can through bolt your new fitting. You need to treat the deck as the middle of a sandwich fitting on top or with plate and large washers or preferably a backing plate on the inside.
1976 - C22
"AnneMarie"
User avatar
kobrie38
Posts: 12
Joined: Sun Jul 24, 2011 12:38 pm
Location: Buffalo, NY

Post by kobrie38 »

Wilco on removing the rivets, but how to I place the new ones in? And I get what to do once I get under the deck, but I don't understand how to actually gain access to the underside, do I have to cut through the hull? And thanks for all the help!
Ex Scientia Tridens
mariner
Posts: 412
Joined: Thu Aug 21, 2008 3:33 am
Location: Cleveland, Ohio

Post by mariner »

kobrie38 wrote:Wilco on removing the rivets, but how to I place the new ones in? And I get what to do once I get under the deck, but I don't understand how to actually gain access to the underside, do I have to cut through the hull? And thanks for all the help!
If you remove the entire rub rail, you Should be able to separate the hulls. Installing rivets is no big deal, just some rivets and a rivet tool. Separating the hulls may be a bit more difficult. If you cannot accesss the inside and you dont wNt to install " inspection ports" that's the best way to do it , it will allow you to fiberglass inner support on the bottom, and install backing so you won't need plates on the deck.
1976 - C22
"AnneMarie"
User avatar
kobrie38
Posts: 12
Joined: Sun Jul 24, 2011 12:38 pm
Location: Buffalo, NY

Post by kobrie38 »

Wilco, I'll remove the rub rail tomorrow. When I put it back on, should I use both epoxy and the rub rail, or will the rub rail hold it? Lastly, what is an "inspection port"?
Ex Scientia Tridens
mariner
Posts: 412
Joined: Thu Aug 21, 2008 3:33 am
Location: Cleveland, Ohio

Post by mariner »

kobrie38 wrote:Wilco, I'll remove the rub rail tomorrow. When I put it back on, should I use both epoxy and the rub rail, or will the rub rail hold it? Lastly, what is an "inspection port"?
The rub rail is only to protect the fiberglass edge, most likely the two halves are caulked and screwed together.
1976 - C22
"AnneMarie"
User avatar
mcrandall
Site Admin
Site Admin
Posts: 658
Joined: Sat Nov 27, 2010 9:35 am
Location: Muskegon, MI
Contact:

Post by mcrandall »

At the risk of butting in, here's a before and after of an inspection port. Basically, you open a hole in the deck, bulkhead, etc strategically located so you can reach what you need to...then cover the hole with a collar and screw-on cover. Shazaam!

Image

Image

Welcome aboard!!!

Mark
Mark
http://s1213.photobucket.com/albums/cc4 ... ew%20C-22/
1975 C-22 currently named Stardust (soon to be "Angela Marie")
User avatar
kobrie38
Posts: 12
Joined: Sun Jul 24, 2011 12:38 pm
Location: Buffalo, NY

Post by kobrie38 »

OK, thanks! I'll look into that. Do you have to go to a marine for one (is it a boat specialty part), or is that something that can be picked up in plumbing section at a home improvement store?
Ex Scientia Tridens
mariner
Posts: 412
Joined: Thu Aug 21, 2008 3:33 am
Location: Cleveland, Ohio

Post by mariner »

Shazam! All of this stuff is available on line or on eBay. Get a west marine catalog so you can see generally what's "out there" and then price shop.
1976 - C22
"AnneMarie"
User avatar
kobrie38
Posts: 12
Joined: Sun Jul 24, 2011 12:38 pm
Location: Buffalo, NY

Post by kobrie38 »

Another question here, the hull was all dirty and the paint corroded as in picture 1, and after sanding it down to picture 2, noticed that it was still uneven and very scratched up and rough. After taking it down further, I noticed that in some parts, there was wood beginning to peek through (picture 3) mostly around the major curves, and that in a few spots, there was just small dime sized areas where there was wood showing right through, but these spots are not from the sander, but they were large scratches previously. What I would like to know is, if I paint over these, will the water eventually damage the hull in these spots, or should I be OK?

PICTURE 1:
Image

PICTURE 2:
Image

PICTURE 3:
Image

PICTURE 4:
Image
Ex Scientia Tridens
mariner
Posts: 412
Joined: Thu Aug 21, 2008 3:33 am
Location: Cleveland, Ohio

Post by mariner »

Wood? You sure that isn't fiberglass below the gelcoat ?
1976 - C22
"AnneMarie"
User avatar
kobrie38
Posts: 12
Joined: Sun Jul 24, 2011 12:38 pm
Location: Buffalo, NY

Post by kobrie38 »

No, I have no idea what fiberglass looks like, but I just always assumed that it was lighter in color.
Ex Scientia Tridens
User avatar
mcrandall
Site Admin
Site Admin
Posts: 658
Joined: Sat Nov 27, 2010 9:35 am
Location: Muskegon, MI
Contact:

Post by mcrandall »

A little blister action maybe?
Mark
http://s1213.photobucket.com/albums/cc4 ... ew%20C-22/
1975 C-22 currently named Stardust (soon to be "Angela Marie")
mariner
Posts: 412
Joined: Thu Aug 21, 2008 3:33 am
Location: Cleveland, Ohio

Post by mariner »

check out this site, you basically have the same type of restoration as the sunfish. You will probably need a bit of fiberglass and or epoxy work. I don't think you have "wood boat", its fiberglass...

http://www.byershome.net/_Boat/Boat.htm
1976 - C22
"AnneMarie"
Post Reply